Showing posts with label DIY. Show all posts

11 January 2012

DIY End Table Revamp

my latest DIY project began with a couple of end tables I purchased at a local thrift store for 15$ each. they weren't the prettiest to say the least, but what attracted me to them was that they were solid wood and very sturdy. solid wood can be sanded and painted easily and will stand the test of time.

this go around i didn't just want to paint my new tables. i have painted many a piece of furniture and i thought it was time to try my hand at something new. i decided it was time to give glazing a whirl and i am really happy with how they turned out! glazing gives a whole new dimension to painted furniture.

for this project you will need:

- clear mixing glaze [found here]

- brown or black acrylic or latex paint to tint glaze [i used cheap craft paint found here]

- good quality latex paint in semi-gloss or satin

- good quality paint brush

- old rags

- container of water

-fine grain sandpaper


before

Step One:
give entire piece of furniture a light sanding. wipe off any dust or debri with a damp cloth before painting. 

Step Two:
give entire piece of furniture a coat of paint in your color of choice using a quality paint brush. [it really does make a tremendous difference to spend a little extra on a quality paint brush vs. the value options.] let the furniture dry over night. you can repeat this process if necessary, though i only applied one coat.

Step Three:
now the fun begins! it's time to mix your glaze. i went by the formula four parts glaze to one part paint. however, if you would like your glaze to be darker or lighter you can definitely adjust the formula. it's a forgiving process, so don't fret and just have fun with it!

Step Four:
now it's time to apply the glaze and there are certainly many different ways this can be done. it's important to work in sections because glaze dries quickly. decide where to begin and paint a decently thick coat of paint on your first section. you can either dampen a rag and manipulate the glaze that way or use a wet paint brush. after trying it both ways i personally liked the look of the paint brush. it almost gives a wood grain effect. either way, the goal in this step is to take a little of the glaze off with the rag or paint brush while leaving glaze in the nooks and crannies to give an aged effect.

Step Five:
let the piece of furniture dry for a few days or up to a week if necessary. if it still feels sticky to the touch, it hasn't dried completely. once dry you can paint a coat of polyurethane over it for protection. this is recommended for heavy use pieces especially.


after


i hope this tutorial has helped you or at least inspired you! i'm sure there are a ton of details i left out, and if that's the case please email me or leave a commment with your questions. i'm by no means an expert, but i would love to offer advice based on what i have learned with this project. also the DIY network offers up some great tips here.

what do you think of how it turned out? do you like the look of glazing or not so much? i would love to hear your thoughts!

10 January 2012

a few tips for organizing your abode in style

a happy home is an organized home.
these are truly words to live by in my opinion. i thought it would be fun to gather a few ideas for stylishly organizing your abode. organizing can be really tricky and doing it in style even more so. sure we can all throw things away and clear the clutter, but it's the actual arranging and making sense of everything that can get tough. [at least for me.] hopefully these ideas will help you as well as me to get things in order for the new year ahead! 

 [real simple]

are you so tired of your necklaces getting tangled and wasting valuable time trying to mend them? simply use a wall mounted coat rack to hang them neatly and tangle free.

[real simple]

use a desk organizer to stow away cutting boards and cookie sheets neatly under the cabinet. this is a great way to free up valuable counter space. love this one! 

[real simple]

a magnetic spice rack can also double as office storage. hang above your desk for easy access to staples, paper clips, rubber bands, etc. find one here.

 [the style files]

recycle an old dresser into a new buffet for your dining room. paint it with a coat of chalkboard paint and use the drawers to organize your linens and dishes. [chalkboard paint can be tinted in literally any color you dream of at home depot.]

 [pinterest]

whether you have a library's worth of books or just a small bookshelf it may behoove you to organize by color. not only is it convenient while searching for your next read, but it's also visually striking.  

[martha stewart]

designate a pretty tray as a catch all for books, magazines, remotes, etc. on your nightstand or coffee table. 


 [babble blog]

make the most of your under cabinet storage in the bathroom. attach shelving to the inside of cabinet doors for extra space.

[apartment therapy]

save counter space by wall mounting wire baskets to organize your kitchen utensils. 

[pinterest]

when storage is limited in a bathroom utilize a hanging basket system to store towels, washcloths, and toiletries. 

[my sweet savannah blog]

yet another idea to free up valuable counter space in the kitchen! wall mount wire baskets to store produce, drinks, or whatever else you may need room for. 

[my sweet savannah blog]

organize the garage by simply vertically mounting coat racks on the walls. what a great way to easily sort your garden tools and save floor space.

[home made simple]

use a ladder for displaying and organizing your heels! genius!

22 November 2011

diy thanksgiving tables

thanksgiving is fast approaching and whether you are a guest or a host this year it's time to start gathering decor and recipes to make this a holiday to remember. with the table being the center of attention i thought it would be appropriate to post some beautiful tablescapes and centerpieces. 


[design sponge]

this beauty is courtesy of design sponge. if you're ready to get crafty and tackle a floral design project they have the tutorial to get you started. i love the movement that the pheasant feathers add to this gorgeous centerpiece.


[pinterest]

i love the idea of using a pumpkin as a vase for a floral arrangement. mums, berries, and beautiful branches pair together to make a colorful work of art for your table. use a piece of burlap as a table runner and scatter a few pommegranates around for a festive fall table.


[birch and bird]

the birch and bird blog has provided us with this lovely neutral tablescape. paint pumpkins of different sizes white and add some interesting white vases in various sizes to create a lovely neutral tablescape. pair with white table linens in various patterns to add interest and finish off the look.


[one charming party]

this is a great tablescape for the sentimental soul. i love the idea of mixing in family photos with fall pumpkins. use a candlestick, wine cork, and paperclip to create the perfect stand for your family photos.

29 August 2011

Projects.

Free? Furniture? I'll take it! My dad recently moved into a smaller home and had loads of extra furniture. My husband Benji and I weren't going to pass up the opportunity to frugally furnish our own abode so we went to take a look at his storage unit. It was filled to the brim with goodies. One of which was this country little table made of knotty pine. It wasn't the prettiest thing I have ever laid eyes on, but I saw potential.

Unfortunately my over-eager self did not get a before picture of this dining set before I got to work on it. Trust me, it wasn't pretty with its out of date yellowy oak stain and knotty wood look. So I bought dark stain, polycrylic and all the finishing touches and got to work. It.was.an.attrocity. The gel stain dried waaaay to quickly and was sticky and splotchy the next day. I sanded it back down and gave it a coat of trusty old white paint. I spray painted it which probably wasn't the most cost effective method, but definitely the easiest. I gave it a final spray of clear coat for protection against scratches and wah-la!


I had an extra window lying around from a previous project and couldn't stand the clutter, but couldn't dare stand to throw it away either. I mean it is absolutely aged to perfection! What is a girl to do, but tape it up and make a chalk board out of it? It makes the perfect little dinner menu for above our table!


Now all I need is a centerpiece...

26 March 2011

Painted Wallpaper Project


I apologize for the terrible quality of the photo. On the top of my wish list is definitely a good camera! Anyway, a few months ago after stumbling on a DIY wallpaper tutorial on the Jones Design Company blog I was inspired to paint this faux wallpaper on one of the walls in our office. Her pictures and wallpaper look phenomenal! She even has provided a link to print out a stencil to use in the process!

This is a great way to add some pizazz to a bland room. It's fun, crafty, and super rewarding when you finish. I will warn you however, that it requires a very steady hand and a LOT of patience! If you aren't in your "forever" home or especially if you live in an apartment this could be a great alternative to wallpaper. You can easily paint over it when you are ready to move to appease your landlord or prospect buyers. It's also really cost effective compared to wallpapering. Almost everyone has a can of white paint and a paint brush lying around. In that case, this project is practically FREE!

Happy painting!

04 March 2011

trash 2 treasure


A long time ago I stumbled upon the Sticks and Bricks blog and have been an avid follower ever since. This lady lives my dream. 
What I would give to be able to scour thrift stores all day for junk to turn to treasure...

Here she has used old discarded golf ball crates to create these industrial chic pendant lamps. So resourceful! 
 

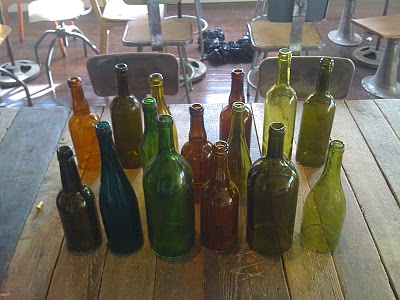
To some this may look like just a bunch of crummy old bottles that need to be dumped in the recycling bin, pronto. 

To others, these are just a diamond in the rough waiting to be discovered! I love old bottles. Well, truth be told I love new bottles too. Needless to say this light fixture makes me smile. 


The re-purposing possibilities for antique crates is near endless. You can use them for magazine holders, turn them over to make a side table, make flower boxes for windows, or in this case you can even fashion them into a beautiful table top. Genius!

24 February 2011

DIY Plant Stands


There has been a lovely spout of unseasonably warm weather here in Georgia for the past week and a half. The temperature has been perfectly situated between the sixties and seventies. The best part about it being warm in February? Still no bugs! Anyway, all of this warm weather has inspired me to do some planting, gardening and playing outdoors. I have started an herb garden which will include mint, basil, oregano, rosemary, and cilantro. I only planted them a few days ago and several of them have already sprouted. Yay! 

Once I move them outdoors I have been trying to decide how I would like to display my little garden. So tonight I was perusing DIY plantstands and found these gems. 


How cute is this idea? Add a vintage tea set to a shabby plant stand and wah-la!

  
Old crates are a dime a dozen at antique stores. Why not hang them on the wall and make a vertical garden out of them? 


I have seen buckets like these at craft stores and even dollar stores. They come in all sorts of colors and patterns. This is a great idea for a kitchen window or a patio. 

It's hard to say, but this may be my favorite find. An old ladder has been re-purposed into the perfect plant stand.  


Love this idea to label your pots. A little chalkboard paint is all you need for this easy diy project. 


When space is hard to come by, a vertical garden is the solution. This stand has been created with a few pieces of wood, plant rings, and paint. 
Have an unused shoe organizer lying around? Re-purpose it into a great holder for a vertical herb garden. Way to recycle! 


So simple, but so cute! Happy gardening!